<!-- IndieAuth -->
<link rel="me" href="https://github.com/bipedalprog">IndieAuth
2020-04-08
I am trying to be better about documenting my learning in side projects. I also tend to learn the hard way, by doing. This is part one, turns out this stuff is complicated.
IndieAuth - Control Your Own Identity
I am working on a micro-blogging application and started looking into how to authenticate someone. I do not want to maintain a login system due to all of issues. I have worked on a couple of projects that use OpenID/OAuth and would like to go in this direction for my own site.
I noticed on the Indieweb site that I can use my personal website for authentication just by adding a link tag to my head on the home page. So the easiest way to approach IndieAuth is by linking to one of your social media accounts. Then use IndieAuth.com to provide the authentication. See: Sign in with your domain name. and RelMeAuth.
Step 1
So I added this to the header template for my website. Do not use Twitter, it does not work anymore, the IndieAuth page says Twitter changed their API.
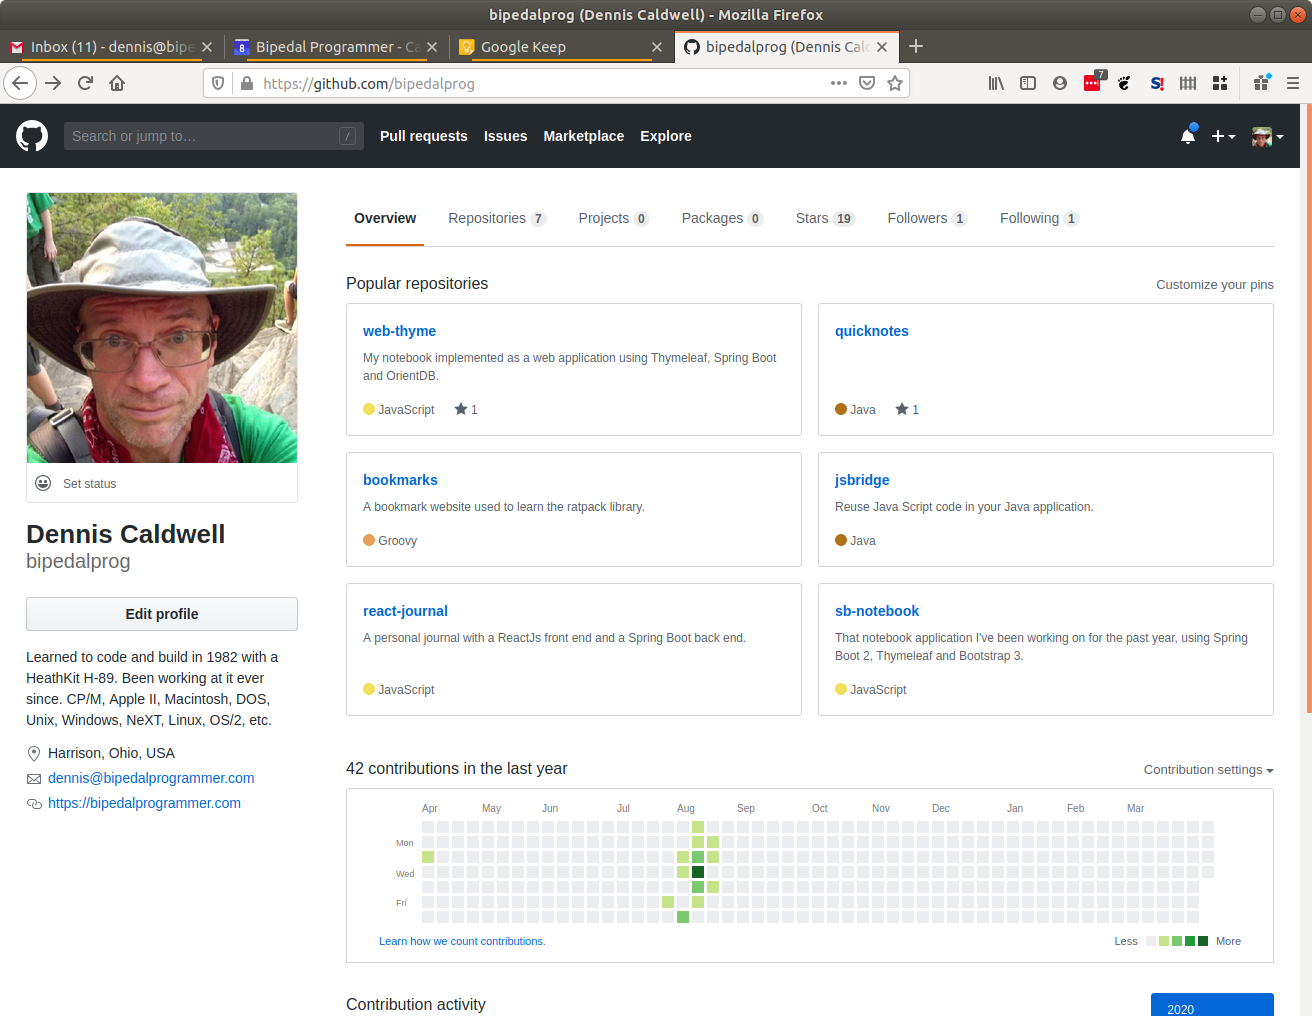
Step 2
Then go to GitHub and open your profile. Make sure your web page link matches the link you use to reach your home page. Mine still used http as the type so it did not work the first time.
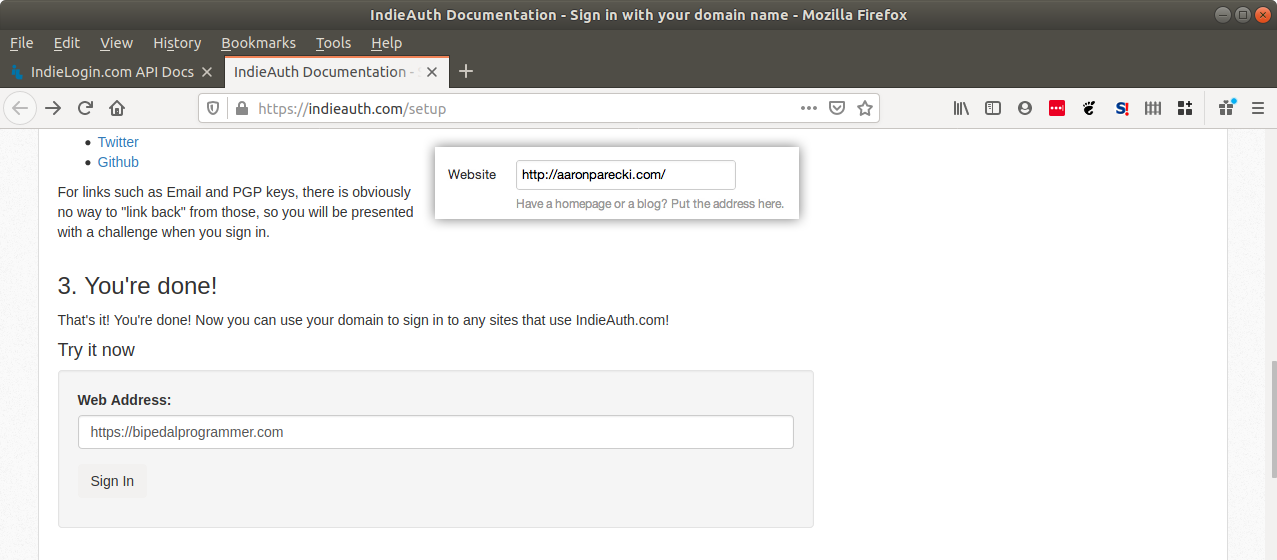
Step 3
Now use the Try it Now box on the IndieAuth.com setup page to verify that you have this correct.
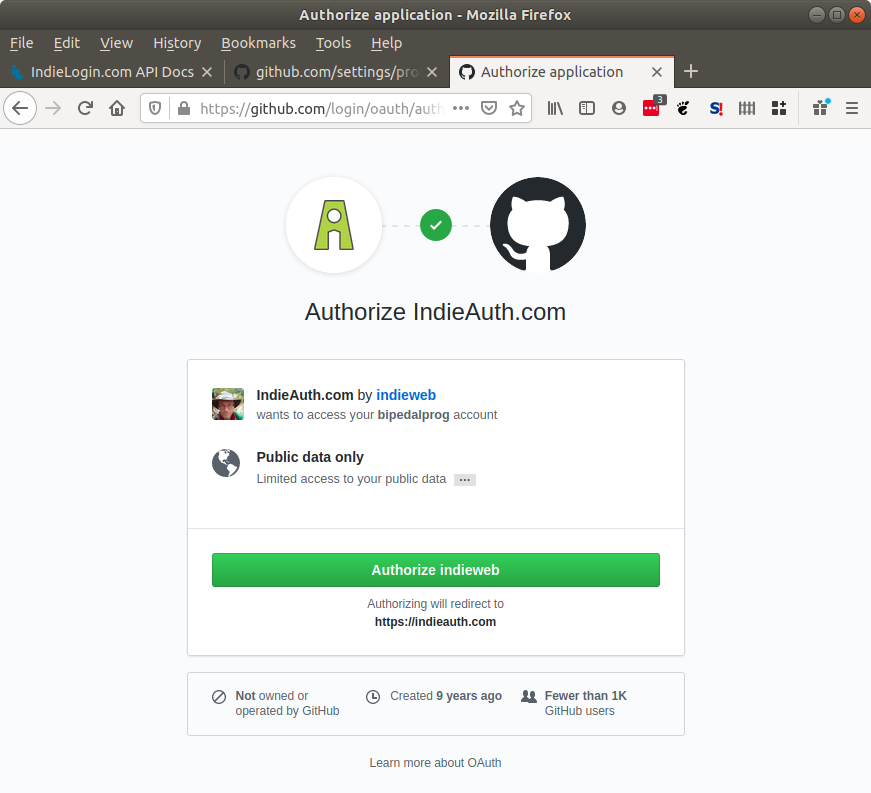
Step 4
This takes me to the IndieAuth.com page where I can confirm that I want to use GitHub as my authentication provider.

Step 5
Clicked the button to proceed.
Step 6
I was already logged into GitHub in another window. So I only had to authorize IndieWeb.
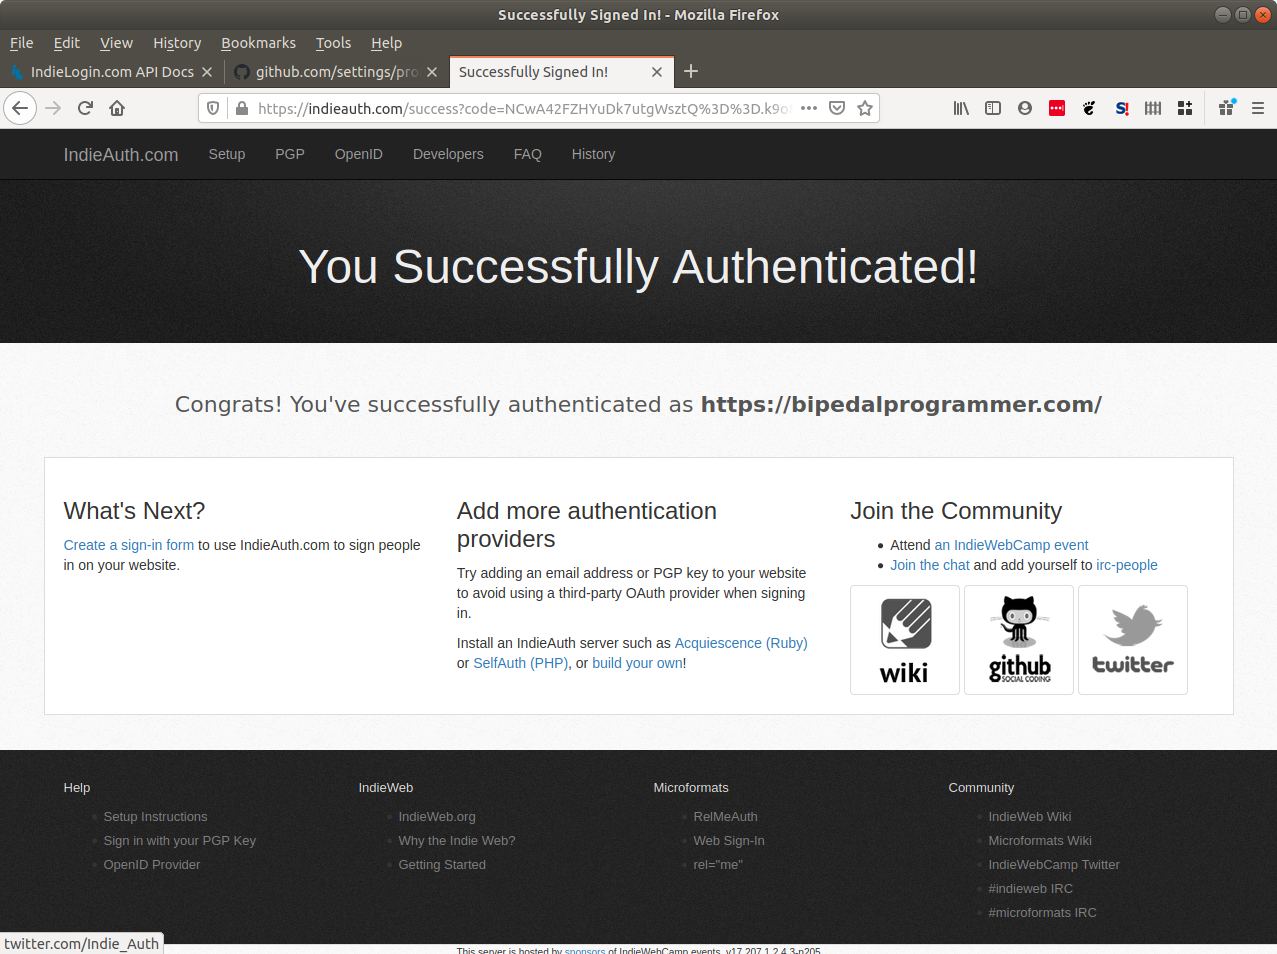
Done
And it’s complete. This works with any site that supports IndieAuth OAuth provider.
